An intelligent voice minion created using the Qiyingtailun offline voice module. With an MP3-TF-16P module, it can play offline audio resources, such as children's music and fairy tales, and can also imitate fire trucks, police cars, ambulances, as well as lanterns and night lights.
Sample voice content for this project:
1. Hello and good night
2. Minion’s magical laughter
3. Imitate fire trucks, police cars, and ambulances
4. Children’s poetry recitation
5. Idiom stories
6. Fairy tales
7. Children’s songs
8. Children’s songs
9. Play specific songs
Other functions:
RGB lights, night lights, eye movements, audio playback, eye LED rhythm
Original published for the first time.
GPL3.0
Offline speech recognition uses Qiyingtailun's CI-C22GS02S module. In order to realize the playback of TF card offline resources, the MP3 module model MP3-TF-16P is used together. The voice module sends commands through serial port 1 for control. .
This project has gone through 4 versions of iterations:
This version uses two speakers, one for playing the response words of the voice module and one for playing the MP3 module resources. The MP3 module speaker output is designed with a voltage doubler circuit for audio LED rhythm. However, because the LEDs are connected in series and the voltage is insufficient, the effect is almost invisible after being installed inside the casing.
Offline resources, including audio files for broadcasting sounds, are placed on the TF card of the MP3 module. Audio resources of the same type are placed in the same folder. The voice module controls the MP3 module to play the specified file through serial port commands.
1. Register an account on Qiyingtailun AI platform .
2. Log in to the platform account
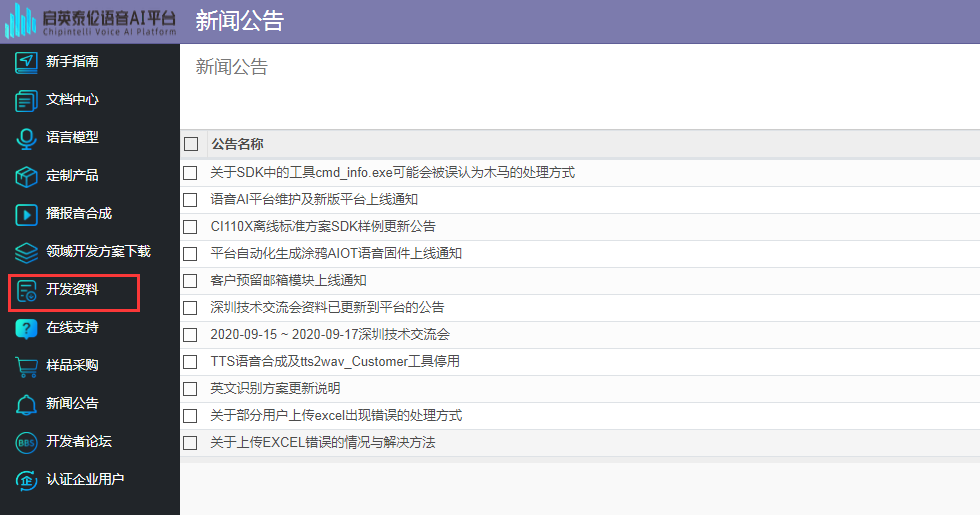
3. As shown in the figure below, select "Development Data" on the left menu bar to enter the main interface of development data;
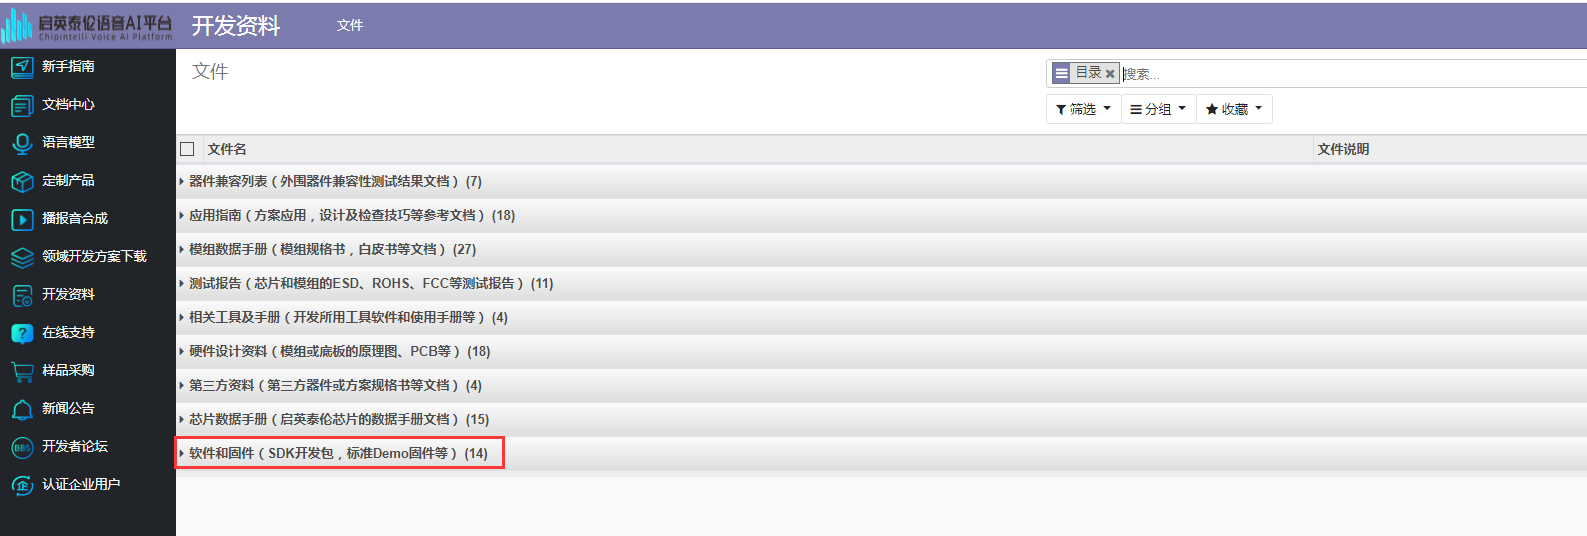
4. Step 3: As shown in the figure below, select "Software and Firmware (SDK Development Kit, Standard Demo Firmware, etc.)";
5. Select the SDK version you need to download, as shown in the figure below (this figure takes "CI112X_SDK_V1.2.9" as an example);

6. As shown in the picture below, click "CI112X_SDK_V1.2.9.zip" to download;

7. As shown in the figure below, wait for the loading to complete and then save the file;
Please note: Do not exit or refresh the interface during the loading process, otherwise the production progress will be terminated!

8. Select the specified folder to store the SDK compressed package;
Get IDE
The official has configured a green version of Eclipse. On the "Development Materials" - "Related Tools and Manuals" page, obtain the Baidu Netdisk download address.

software development
Unzip the downloaded Eclipse IDE and SDK separately (note that it must be an English folder), then use Eclipse to import the SDK project to start development.
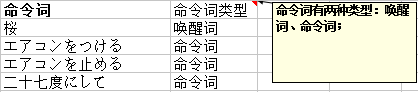
The key is to modify the user_msg_deal.c file and execute the function based on cmd_id. cmd_id is the serial number in front of the "command word list" in the "Language Model", where cmd_id starting from 2 is the command word (cmd_id=1 is the wake-up word).
The voice module uses freeRTOS, and the programming language is C language.
The core business logic code is as follows:

I have made many encapsulations of the play_chengyu() function, but its essence is to play a folder in a loop (the folder parameter dir is the folder name in numeric form. I put the same type of files in the numeric folder, such as 01, 02, 03,04, which is the requirement of MP3 module for file access).
#define DIR_CYCLING_CMD         0x17
mp3_send_cmd(DIR_CYCLING_CMD, 0x00, dir);
The function to send commands from the serial port is as follows:
void mp3_send_cmd (uint8_t cmd, uint8_t high_arg, uint8_t low_arg) {
uint8_t i;
uint16_t checksum;
mp3_cmd_buf[3] = cmd;
mp3_cmd_buf[5] = high_arg;
mp3_cmd_buf[6] = low_arg;
checksum = mp3_checksum();
mp3_cmd_buf[7] = (uint8_t) ((checksum >> 8) & 0xFF);
mp3_cmd_buf[8] = (uint8_t) (checksum & 0xFF);
// Send command to UART1
for (i=0; i<10; i++) {
        UartPollingSenddata(UART1,mp3_cmd_buf[i]);
    }
For the check calculation part, please refer to the debugging manual of the MP3 module document.
For more information on voice module SDK development, please refer to Qiyingtailun AI platform documentation .
For details, please refer to the relevant sections of the Beginner’s Guide in the Document Center.
First enter the Qiyingtailun AI platform , select language model in the left menu bar, click Create, and enter the main interface for language model production.


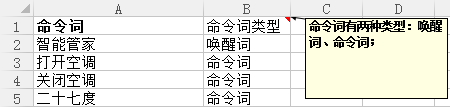
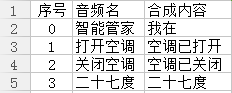
The Chinese sample is as follows:
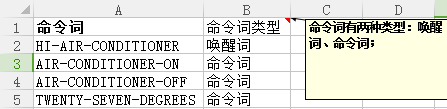
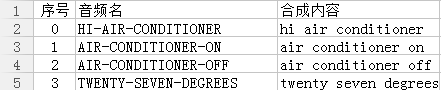
The English sample is as follows:
Japanese sample is as follows:
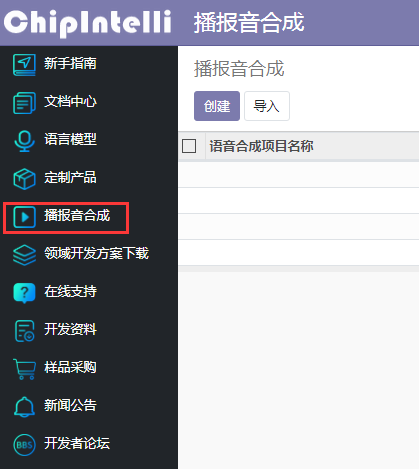
点击左侧的菜单中的“播报音合成”进入该模块,如下图所示:
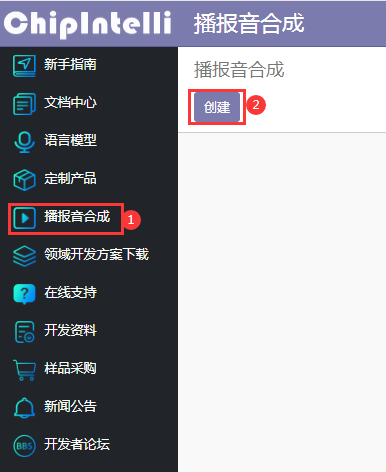
请用户参考如下流程进行操作(注意下方数字标识对应下图中的数字标识),便可进入定制播报音的主界面:
注意
传的播报音样例文件格式模板可以通过创建表单界面中的“下载样例”获取。用户可以按照该模板的格式,填写需要的播报语句,以及其内容,保存后上传。
中文的样例如下图所示:
英文的样例如下图所示:
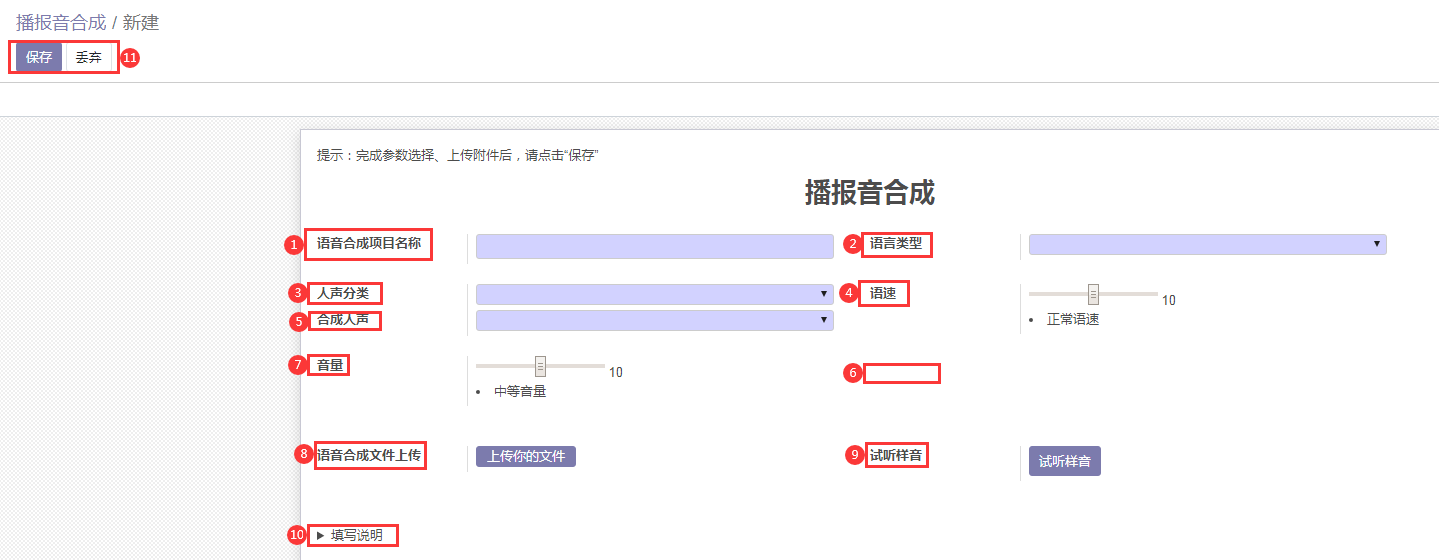
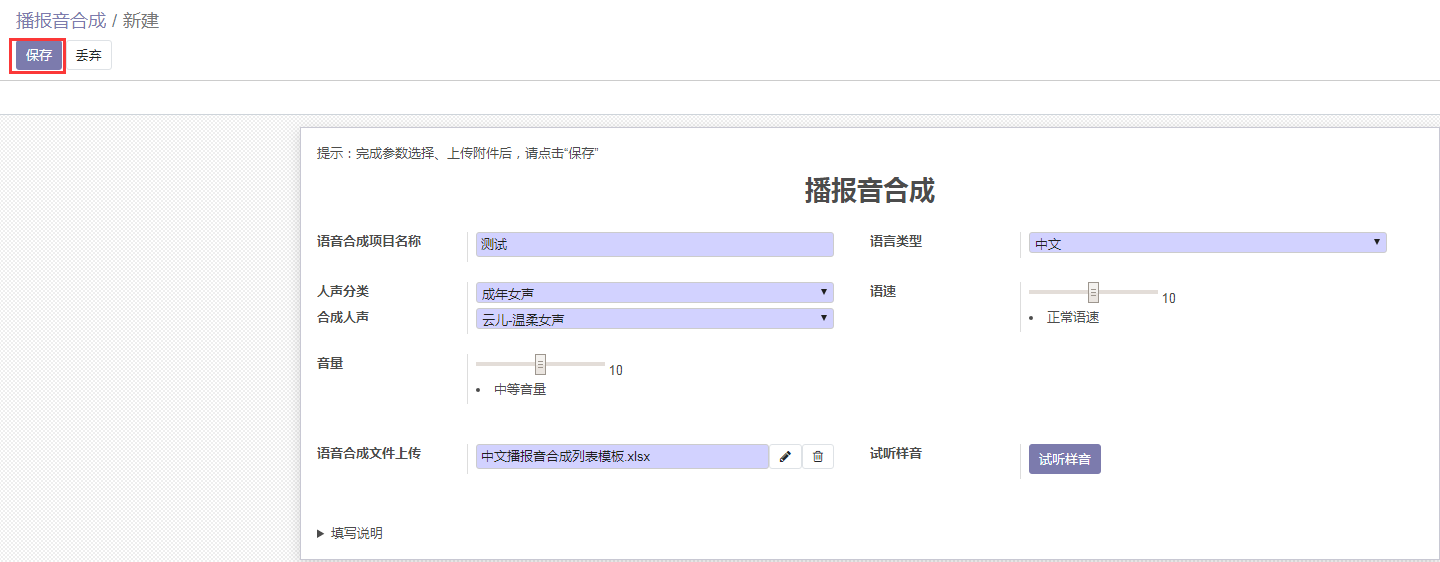
用户在合成播报音时,需先新建表单,填写好表单中对应的内容,如下图所示:
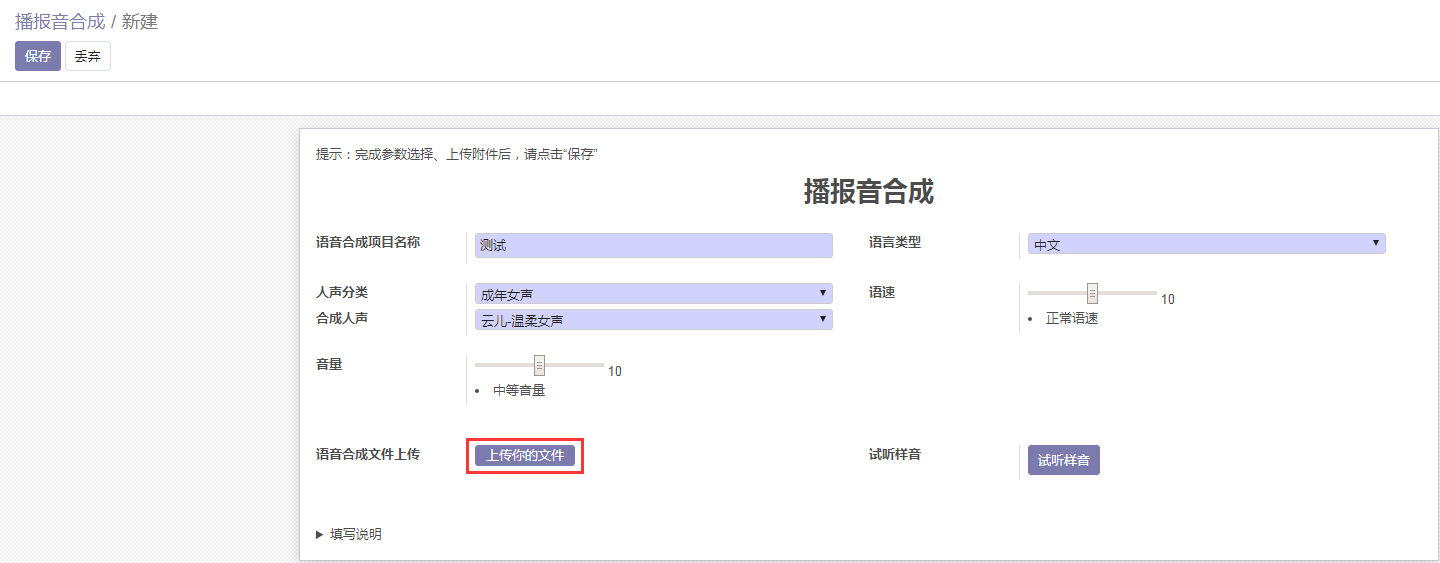
填写完成后,点击“上传你的文件”,上传已经按照规范做好的excel文件。
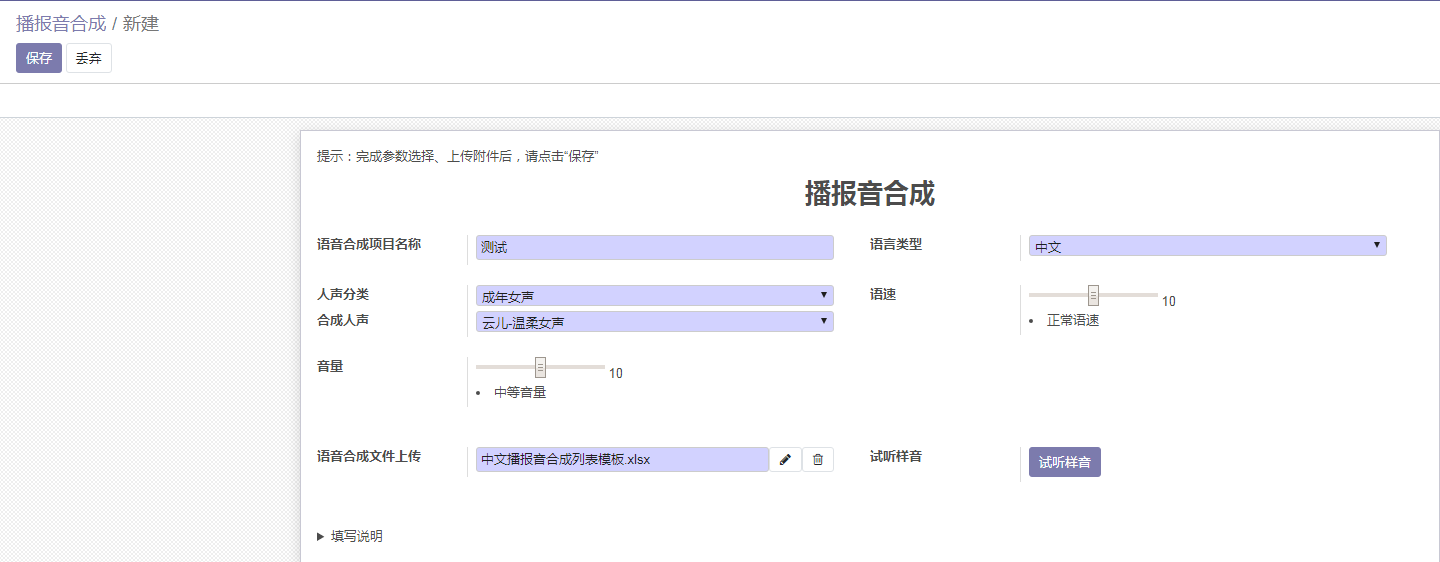
上传完成后,点击左上角的“保存”按键;
等待文件被平台加载;
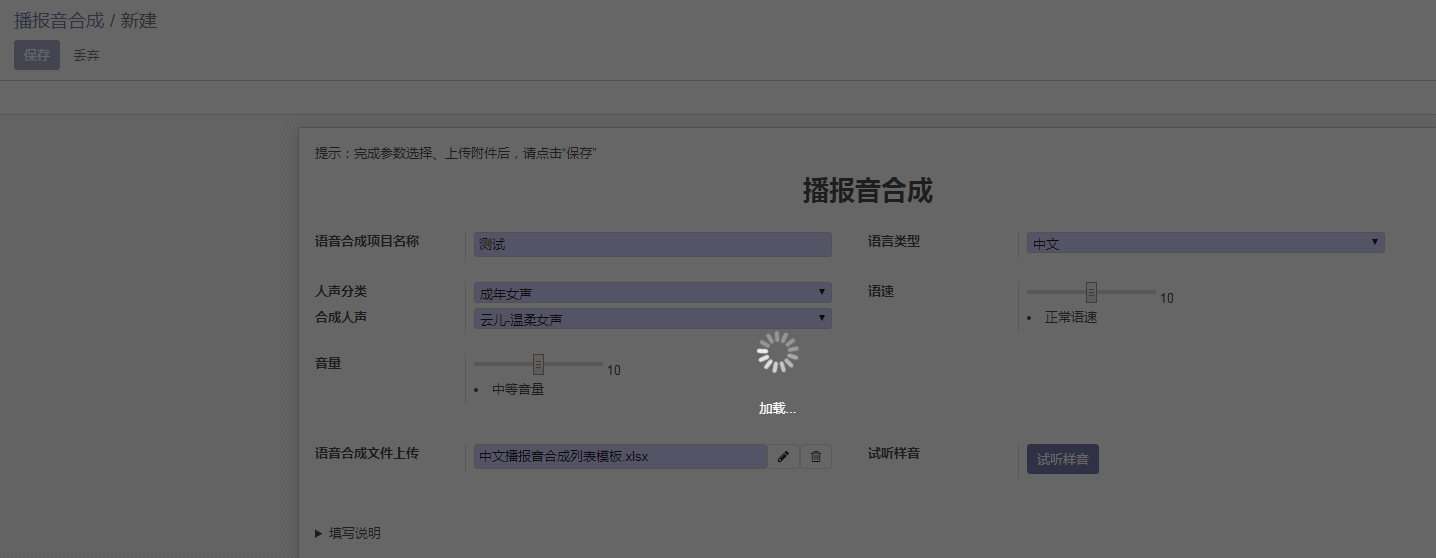
请注意:加载的过程当中请勿退出或者刷新界面,否则制作进度将会终止!
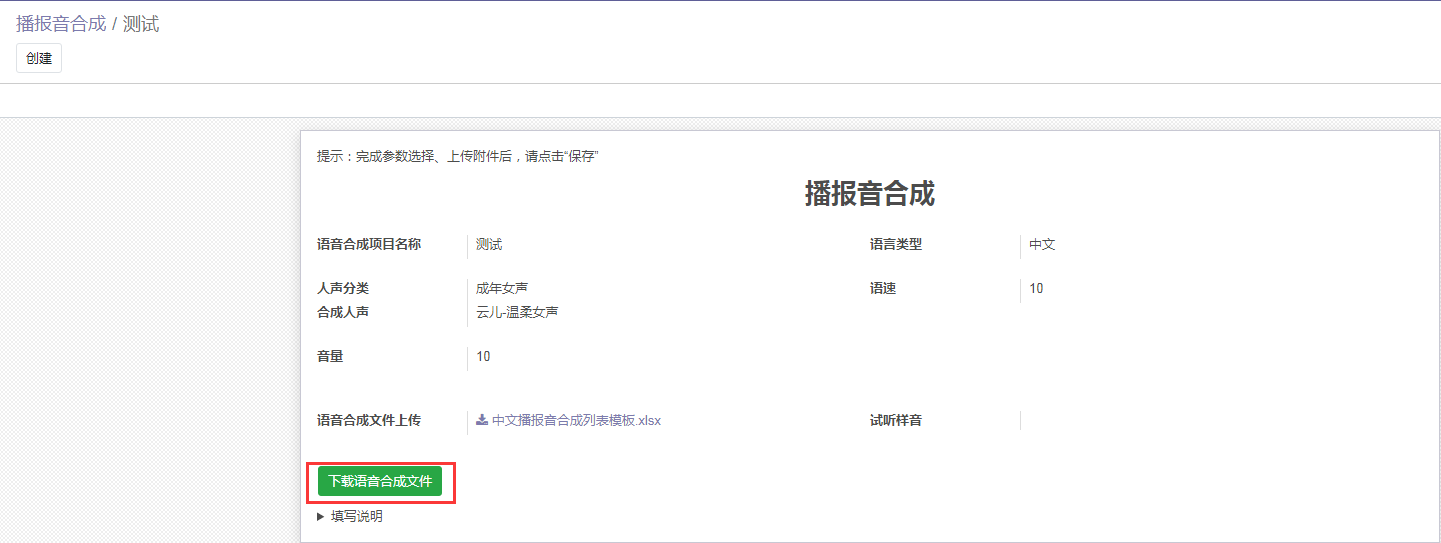
播报音合成成功后,选择“下载语音合成文件”,便可得到生成的播报音。
1. 打开下载的语言模型文件夹中 CmdWordStructure 目录下配置文件[60000]{cmd_info}.xls
2. 将<0>cmd这个表格中的“播报音1ID”,改为从0开始依次递增。如果你需要开机播放欢迎语,那就把<welcome>一行的播报音ID改为一个与表格上方不重复的数字,本例中改为68。<Inactive>和<beep>播报音ID改为文件名前缀不会使用的一个大数字,比如1000。


3. 将<1>wake表格中的“播报音1ID”的第一行改为0,即唤醒词“小黄人”的对应播报音ID为0,与第一个表格一致。如果你需要开机播放欢迎语,那就把<welcome>一行的播报音ID改为<0>cmd表格中<welcome>一行相同的播报音ID,上面是68,所以这里也是68。<Inactive>和<beep>播报音ID改为文件名前缀不会使用的一个大数字,比如1000。

解压上面合成并下载的播报音压缩文件,里面的文件名前缀应该是对应了上面那个<0>cmd表格中的播报音ID。

如果你在上面设置了欢迎语播报音ID,也可以在上面播报音合成步骤,将它加入播报音合成列表。或者也可以使用一段音乐作为开机欢迎语,关键是要将它的前缀改为<welcome>那一行设置的播报音ID,在上例中我们设置开机欢迎语播报音ID为68,那么开机欢迎语的文件名就应该是"[68]开机欢迎.wav"或者"[68]开机欢迎.mp3"。
注:上述步骤是将播报音合成到固件中。而本项目中使用MP3模块播放所有播报音,所以本项目是把所有播报音放在TF卡上,由操作系统发出命令来控制MP3模块播放指定文件。虽然我使用MP3模块播放播报音,但是固件合成仍然需要对应的播报音(既然实际不使用模块播报,可以使用任意的文件替代,但是不能没有),如果固件内缺少播报音会无法正常运行。播放指定文件夹串口命令,请参考上文代码。
CmdWordStructure:该文件夹存放的内容为{cmd_info}表格,为用户词条置信度相关参数配置文件;
GfstCmd:该文件夹存放的内容为平台生成的命令词模型文件;
GfstWake:该文件夹存放的内容为平台生成的唤醒词模型文件;
SDK语言模型文件夹位置:CI112X_SDK_ASR_Offline_V1.x.xsampleinternalsample_110xfirmware
用户将下载的语言模型文件夹中 GfstCmd 以及 GfstWake 这两个文件夹里的[0]asr_chinese_SE292_CI1122_normal.dat和[1]asr_chinese_SE292_CI1122_normal.dat文件替换SDK语言模型文件位置内的asr文件夹里的内容。
用户将下载的语言模型文件夹中 CmdWordStructure 目录下配置文件[60000]{cmd_info}.xls,放入SDK语言模型文件夹位置的 user_filecmd_info 内并替换原先的内容;(文件名必须要"[60000]"开头,可以改为类似"[60000](小黄人{cmd_info}.xls"之类的名称)
SDK声学模型文件夹位置:CI112X_SDK_V1.x.xCI112X_SDKsampleinternalsample_1122firmwarednn
用户将下载的声学模型里的内容放到SDK声学模型夹位置内,替换SDK原有的内容,即可使用。
文件夹位置:CI112X_SDK_ASR_Offline_V1.x.xsampleinternalsample_110xfirmwarevocie
用户将新生成的播报音文件放入上述指定的目录中。
在烧录前需要先将USB转串口的电源地(GND)、串口(TXD、RXD)收发引脚分别和模块对应的引脚连接起来,注意USB转串口的RXD和TXD分别对应模块的UART0_TX和UART0_RX。
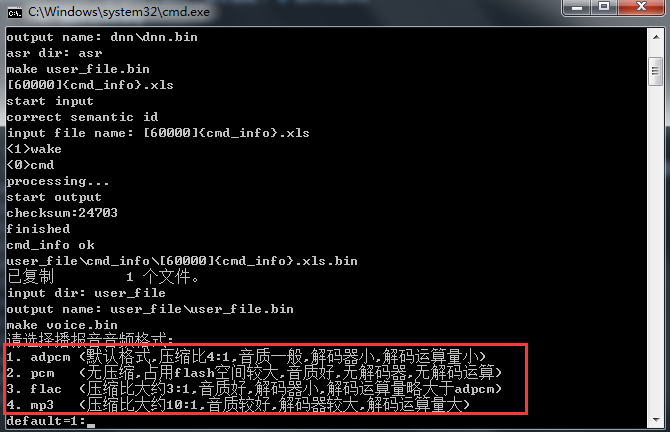
1. 第一步:打开“合成分区bin文件.bat”;

2. Step 2: As shown in the figure below, you will be prompted to select the audio format when merging partitions. Novice users should select "adpcm". After completing the selection, press the Enter key. After the loading is completed, the interface will automatically close;
3. Step 3: Open "package upgrade.bat";

4. Step 4: Select the chip model corresponding to the development board you purchased (this operation occurs for the first time, please proceed directly to step 5 for subsequent uses);
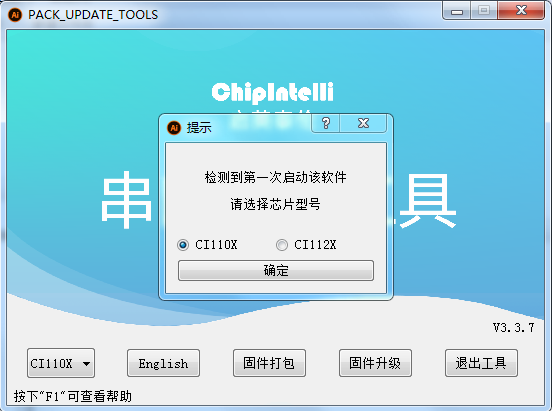
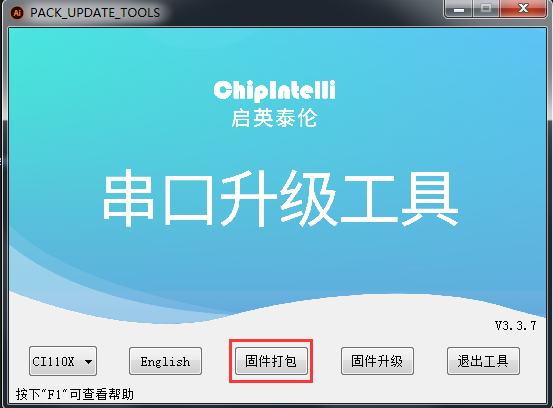
5. Step 5: After confirming the chip model, click the "Firmware Packaging" button to enter the upgrade interface;
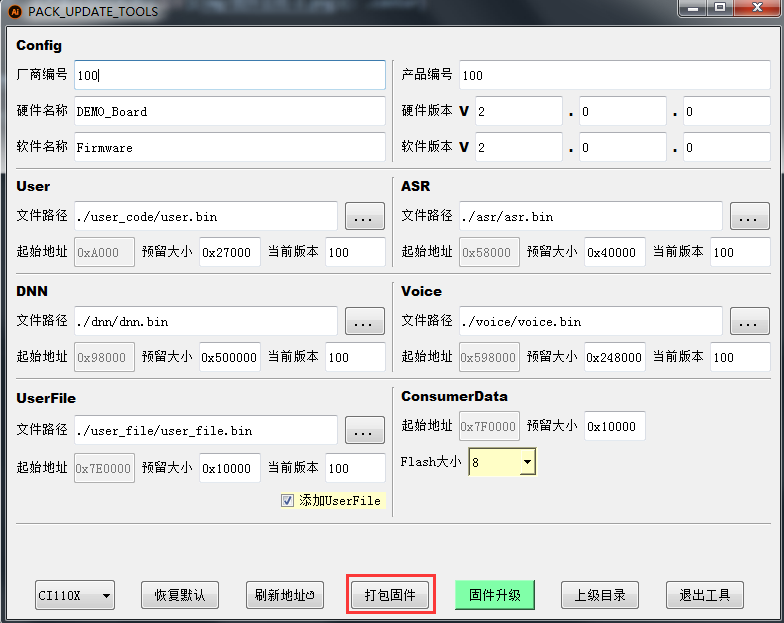
6. Step 6: Fill in the firmware upgrade information:
Fill in the software and hardware related information in the version information area.
Select or fill in the bin file path of each partition.
Click "Refresh Address" and click "Package Firmware".
If a pop-up window prompts an address conflict, adjust the size of each partition and perform the previous step again.

Step 1: Open "package upgrade.bat";
Step 2: Select the chip model corresponding to the development board you purchased (this operation occurs for the first time, please proceed directly to step 3 for subsequent uses);
Step 3: After confirming the chip model, click the "Firmware Upgrade" button to enter the upgrade interface;

Step 4: Firmware upgrade


PCB bare board and logo verification.

Soldered Boards (4th Edition)
 |
 |
Internal and external pictures of Minion after installation
 |
 |
 |
For the demonstration video, please refer to the link at Station B. The file is too large and cannot be uploaded.
https://www.bilibili.com/video/BV1V34y1X7jH/

All reference designs on this site are sourced from major semiconductor manufacturers or collected online for learning and research. The copyright belongs to the semiconductor manufacturer or the original author. If you believe that the reference design of this site infringes upon your relevant rights and interests, please send us a rights notice. As a neutral platform service provider, we will take measures to delete the relevant content in accordance with relevant laws after receiving the relevant notice from the rights holder. Please send relevant notifications to email: bbs_service@eeworld.com.cn.
It is your responsibility to test the circuit yourself and determine its suitability for you. EEWorld will not be liable for direct, indirect, special, incidental, consequential or punitive damages arising from any cause or anything connected to any reference design used.
Supported by EEWorld Datasheet
EEWorld
subscription
account

EEWorld
service
account

Automotive
development
community

Robot
development
community

About Us Customer Service Contact Information Datasheet Sitemap LatestNews


Room 1530, 15th Floor, Building B,
No.18 Zhongguancun Street,
Haidian District,
Beijing, Postal Code: 100190
China
Telephone: 008610 8235 0740
 京公网安备 11010802033920号

 2SA1577T106QR


