Updated on 2022/5/14:
Updated required tools and components list
****************************************
Project Description:
This project is based on the Arduino IDE environment
The hardware and software parts of this project are open source based on the GPL3.0 open source license (can be modified, shared, and commercially available, but must be open source). Please follow the GPL3.0 open source license rules for secondary modifications.
GPL3.0 license introduction: http://www.gnu.org/licenses/quick-guide-gplv3.html
Since the shell is modified based on libc0607 , this shell is also open source under the CC-BY-NC-SA 3.0 open source license (can be freely modified and shared, but not for commercial use!)
CC-BY-NC-SA 3.0 open source license introduction: https://creativecommons.org/licenses/by-nc-sa/3.0/
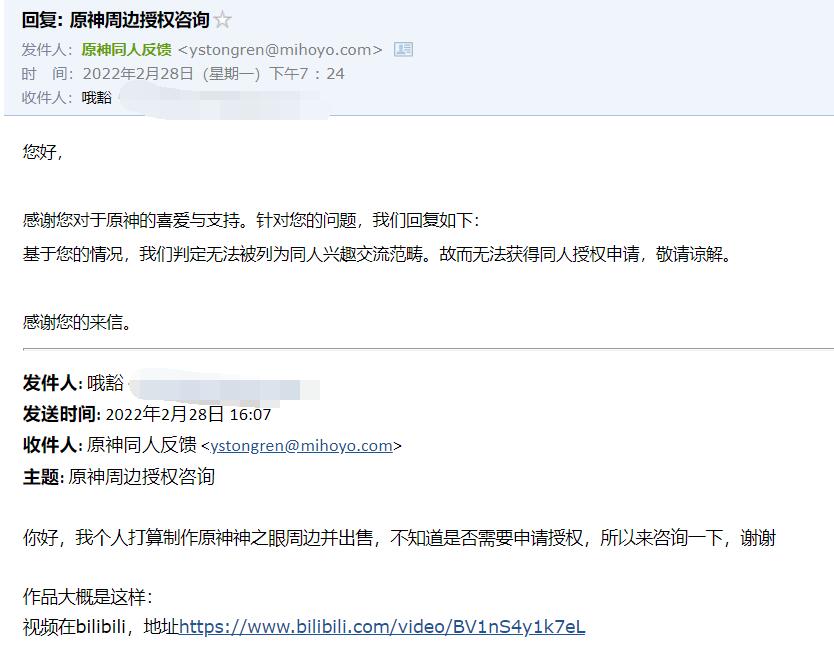
I asked MiHoYo via email, but it cannot be counted as a fan work, so if you want to sell it, you can weigh it yourself.
ArduinoIDE: https://www.arduino.cc
The project uses the Arduino_GFX library to drive the screen: https://github.com/moononournation/Arduino_GFX
Video playback code comes from: https://github.com/moononournation/RGB565_video
The shell is based on the second modification of the Eye of Liyue shell of libc0607 , address: https://github.com/libc0607/esp32-vision
The eye of god material comes from Kira , the master of UP station B , material address: https://b23.tv/m50Vcry
Then I use AE to add some particle motion effects. The AE project file will be placed in the attachment (the AE version is CC 2017. Please do not use an AE version lower than CC2017 to open it. You need to install the TrapcodeParticular particle plug-in). At the same time, various The 60-second dynamic video file of the elements is convenient for everyone to use editing software to combine and modify at will.
I have open sourced a round one before ( https://oshwhub.com/Myzhazha/esp32_pico-d4-video ), this time it is a square screen
The welding was too difficult last time. In order to reduce the welding difficulty this time, the main control used the ESP32-WROOM-32U module, and all resistors and capacitors used 0603 packaging specifications.
Super detailed production tutorial: https://www.bilibili.com/video/BV1HS4y1b7tQ
If you have any questions, you can join the group and ask: 636426429 (Do not directly copy the group number to search, there is a chance that it cannot be found, enter the group number manually)
Battery life: The battery life is about 4 hours when the screen is always on.
Main control: ESP32-WROOM-32U module
Screen: 1.54-inch ST7789 screen
Regulated LDO: RT9013-3.3
Charging IC: TP4055
Charging interface: Type-C
Battery: 602828 lithium battery or 603030 lithium battery or 603035 lithium battery (battery thickness is less than or equal to 6mm, length and width are less than or equal to 32mm respectively)
Switch IC: EC190707
Library version used by Arduino IDE :
Arduino GFX Library: V1.1.1
ESP32 development board library: V1.0.6
Special note: D1 is a diode. Its function is to send a low-level signal to IO23 of ESP32 by briefly pressing the switch. It can be used for other purposes, such as pressing to switch videos or patterns. I don’t know how (justifiably), so I left it. This thing, capable brothers can add it themselves. If you can add it, send the firmware to me 2317833764@qq.com ( I’m not asking for free money )
Precautions:
1. Make the board:
When making the board, please choose a thickness of 1.2mm. If it is too thin, the four pins of the Type-C female socket will be exposed from the back of the PCB (you can use a file to flatten it)
2. Welding:
The J1 pad is a jumper, its function is to connect and disconnect the power supply of the SD card. Because the ESP32 cannot enter the download mode when the SD card is powered on, so the J1 jumper should be short-circuited after the firmware burning is completed.
The screen is fixed with double-sided tape
Be careful not to reverse the positive and negative terminals of the battery. B+ is connected to the positive terminal of the battery and B- is connected to the negative terminal of the battery.
3. Burn:
TTLRXD corresponds to T on PCB
TTLTXD corresponds to R on the PCB
TTL3.3V corresponds to 3 on the PCB
(Be sure to use 3.3v voltage, 5V voltage will damage the screen and ESP32 module)
TTLGND corresponds to G on the PCB
There are two ways to burn, one is to use the Flash Download Tool tool officially provided by Espressif Systems, and the other is to use Arduino IDE to burn.
Open the burning tool
Choose ESP32
Select each bin file, and fill in the following address. After filling in, put a check in front, and then click START to start burning. At this time, press and hold the BOOT key on the PCB and then press the EN key to enter the burning mode.
4. Video conversion:
Since the video being played uses mjpeg picture frames, it needs to be converted using FFmpeg.
FFmpeg official website: https://ffmpeg.org
Or go directly to Github to download: https://github.com/BtbN/FFmpeg-Builds/releases
Or download from network disk: https://pan.baidu.com/s/1VxZJFxCHG9peMqXTLTP0lQ
Extraction code: 2333
Instructions for use: When exporting the editing software, modify the resolution to 240x240 pixels and export to .mp4 format.
Download FFmpeg and unzip it. Hold down the shift key and right-click the mouse in the FFmpeg.exe directory - open the PowerShell window here.
Execute the following command to convert mp4 files to mjpeg format
./ffmpeg -i [你的mp4文件路径] -vf "fps=30,scale=-1:240:flags=lanczos,crop=240:in_h:(in_w-240)/2:0" -q:v 9 [输出路径]
for example:
./ffmpeg -i D:video1.mp4 -vf "fps=30,scale=-1:240:flags=lanczos,crop=240:in_h:(in_w-240)/2:0" -q:v 9 D:videoliyue.mjpeg
After the conversion is completed, put the liyue.mjpeg file into the root directory of the TF card.
5. Shell painting:
Spray paint using self-spray paint, gold + varnish (varnish)
Shell painting tutorial: https://www.bilibili.com/video/BV1cY4y1a7CQ
6. Assembly:
When assembling, please align the Type-c interface first and then press the other side
The plano-convex lens (glass) is glued on. Use a toothpick to pick up a little glue and apply it to the edge of the shell. Apply a full circle before putting the lens in.
(Please use hard glue for glue. Do not use soft glue, which is a glue that becomes solid after curing. Do not use 302AB glue. This glue does not stick to glass. Before purchasing UV glue, ask customer service whether it is hard glue.)
The back cover is oriented when assembled, as shown in the picture: (Because it is a model modified with C4D, the C has been removed, so I am too lazy to modify it to be symmetrical)
Correct✔
Error ❌
The attachment provides a list of tools and components required for production. You can also export the BOM table yourself and place an order with one click on Lichuang Mall (except for a few components that are not available in the mall, other components have been matched with mall numbers)
All information address:
Baidu network disk link: https://pan.baidu.com/s/1YE66-KK5nZJ0nIkSxgwWMg extraction code: 2233
Alibaba cloud disk link: https://www.aliyundrive.com/s/K28vnD72VUB

All reference designs on this site are sourced from major semiconductor manufacturers or collected online for learning and research. The copyright belongs to the semiconductor manufacturer or the original author. If you believe that the reference design of this site infringes upon your relevant rights and interests, please send us a rights notice. As a neutral platform service provider, we will take measures to delete the relevant content in accordance with relevant laws after receiving the relevant notice from the rights holder. Please send relevant notifications to email: bbs_service@eeworld.com.cn.
It is your responsibility to test the circuit yourself and determine its suitability for you. EEWorld will not be liable for direct, indirect, special, incidental, consequential or punitive damages arising from any cause or anything connected to any reference design used.
Supported by EEWorld Datasheet
EEWorld
subscription
account

EEWorld
service
account

Automotive
development
community

Robot
development
community

About Us Customer Service Contact Information Datasheet Sitemap LatestNews


Room 1530, 15th Floor, Building B,
No.18 Zhongguancun Street,
Haidian District,
Beijing, Postal Code: 100190
China
Telephone: 008610 8235 0740
 京公网安备 11010802033920号


 VI-J1WEM


