A Winter-Warm Creation: Light Painting.
First, let's look at two effect images

(without lights) and

(with lights). Circuitry
: This circuit can switch between TYP-C power supply and lithium battery power supply
using a toggle switch. It uses a copper pillar touch switch and has three light levels: white light, warm light, and mixed natural light. A light
tap switches the light, and a long press adjusts the brightness (the lithium battery discharge time depends on the capacity of the lithium battery used).
How about that? Isn't it amazing? (´。✪ω✪。`)
Without the lights, it's a black and white line drawing; with the lights on, it becomes a color picture.
When light painting became popular, I really disliked the laminated structure using A4 paper and film.
Since I frequently used LCSC panels for printing, I wondered if it could be simpler to use a single acrylic sheet for printing
, making assembly easier and improving the texture. After studying the optical principles behind light painting, I discovered that only three layers were needed to achieve this effect . The first and third layers
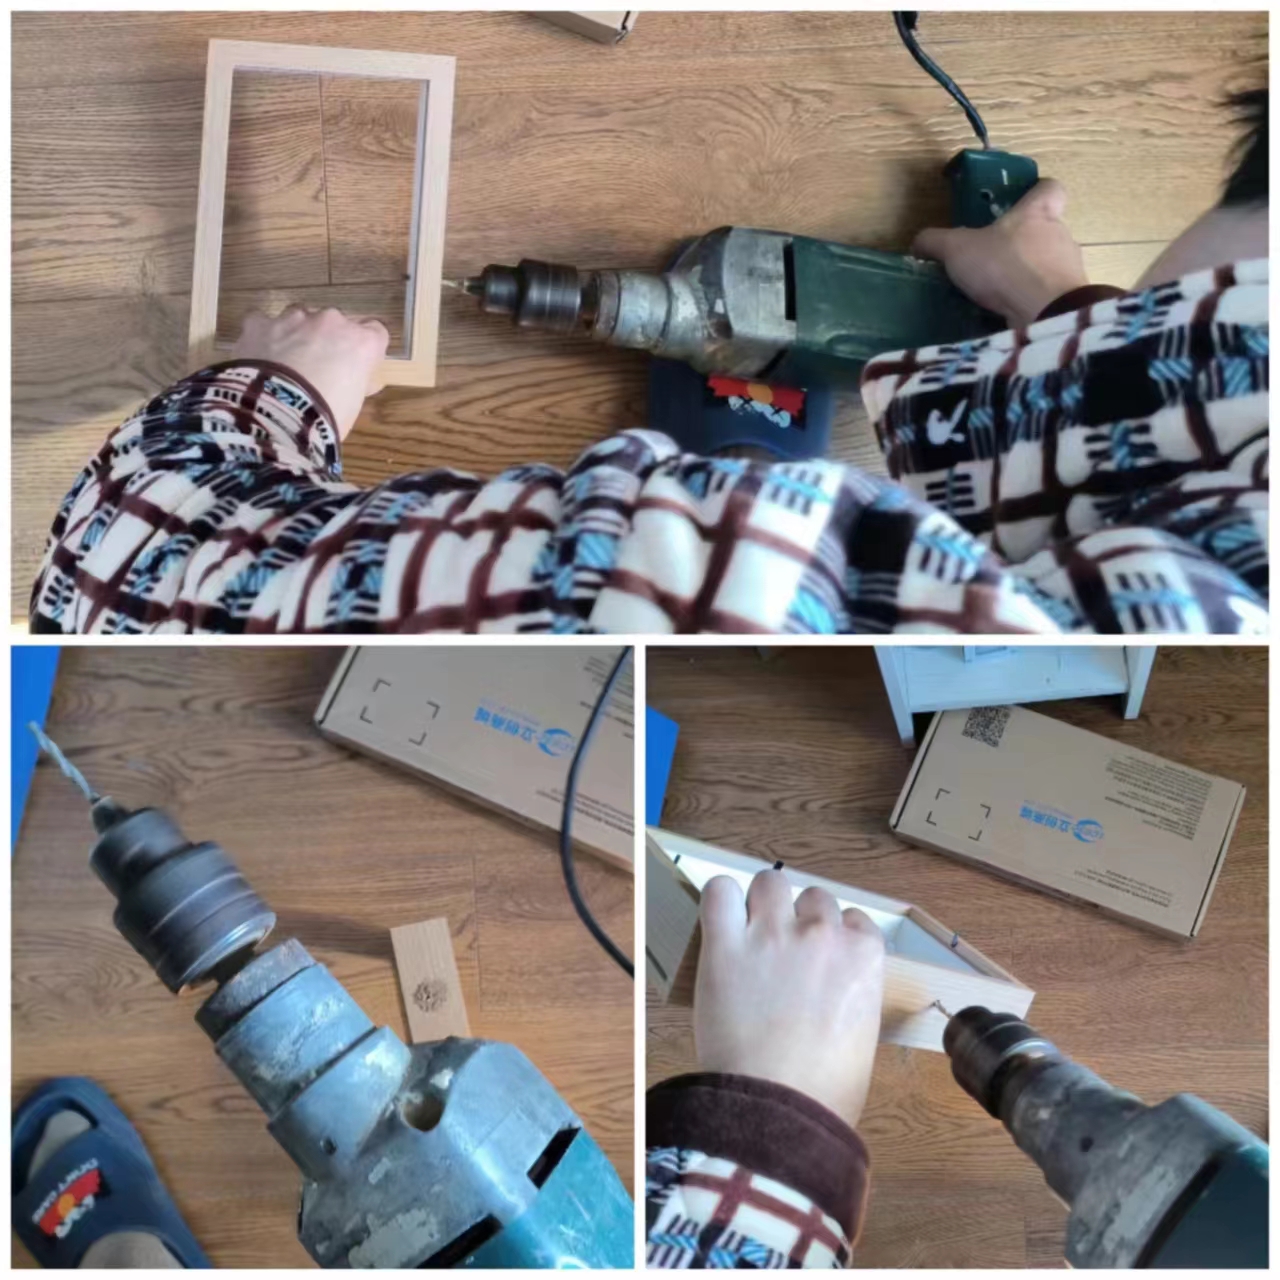
could be printed normally; the key was the second layer . I tested the second layer on the LCSC panel with 0%, 10%, 20%, and 30% opacity. I found that 20% opacity produced the best effect; the colors wouldn't show through without the light, and with the light on, the colors showed good light transmission. My first test was a disaster; I overthought it and printed a five-layer laminate structure on the LCSC panel. The overall appearance was poor. The second test involved testing several small pieces, and the light transmission effect was excellent! (๑>) The third version involved making three 7-inch acrylic pieces. These were made in April, but I didn't know how to do the circuitry, so I put them aside because I really disliked the tri-color adjustable light strip that came with the picture frame, which required a USB connection. So I learned how to make lighting circuits, hoping to achieve better results. In the past six months, I've studied touch chip circuits, lithium battery charging circuits, charging protection circuits, optical principles, lamp board heat dissipation principles, 3D modeling, and material selection. I've also learned some Photoshop-related knowledge and skills, repeatedly reviewing various chip datasheets and calculating current and voltage repeatedly. I just love learning, and I love telling the truth. (「・ω・)「Hey, the circuit section (lithium battery - main control board - aluminum-based lamp board) is shown below. The lamp board and main control board are connected by a toothed, interlocking solder joint (a pin header slot is also provided for pin header connections). The 3D printed grooves are flawless, and the countersunk holes of the copper pillars are recessed, so they don't feel uncomfortable at all. They're assembled and secured with copper screws, which also function as touch switches. I think the sunflower screw is the best part of the material selection; it gives the touch switch a premium feel. When I was designing this 3D shell, I was really impressed by the sliding mechanism that comes with the JLCPCB EDA editor (๑•̀ㅂ•́)و✧. I thought, since there's so much space inside a picture frame, could we just make a sliding box and use the panel as the lid? It's practical and looks great! And here it is! There are 3mm magnet holes pre-drilled at the four corners inside the shell. In the next upgrade, we'll add magnet holes at the four corners of the panel so it won't be so easy to open. It has a resistance switch box effect, and when all the lights are off in the bedroom, it can be used as a bedside lamp! It won't hurt your eyes at all when playing on your phone at night. After talking about the 3D shell version, let's look at the picture frame version. This drill is too long and difficult to operate, and it's also loud QAQ. Because the picture frame needs to drill a hole to install the copper pillar of the touch switch, and the small electric drill I bought at school can't be taken home on the train, I had to use my dad's impact drill . The touch switch is very beautiful and fits perfectly. Originally, I wanted to use this picture as the main center for the warm winter creation (it looks very warm) , but how did you know I designed a red envelope (⑉°з°)-♡ I cut out each dragon in the whole picture one by one using Photoshop. I thought this photo fits the warm winter of the Year of the Dragon better ( •̀ ω •́ )y Then I made a few minor edits in Photoshop to create a black and white line drawing with a warm lighting effect. Let's watch the video! Bilibili video link 1: https://www.bilibili.com/video/BV1Pb4y1P7YA/?spm_id_from=333.999.0.0 Bilibili video link 2: https://www.bilibili.com/video/BV1iT4y1t7LY/?spm_id_from=333.999.0.0


 京公网安备 11010802033920号

 ELM34404AA-N


